DIY Up-cycled Kitchen Cabinet Makeover A Step-by-Step Tutorial
Introduction
Outdated or worn cabinets can diminish the charm of an otherwise beautiful kitchen, and buying new units is both costly and wasteful. Many homeowners hesitate to try spray painting or veneering, unsure where to find quality eco hardware or worried about ending up with a half-finished result.
So how can a DIY homeowner confidently complete a cabinet up-cycle that is both budget-conscious and environmentally friendly? By following this clear five-stage tutorial, which covers tools, preparation, materials, timing, and a detailed cost breakdown, you’ll learn how to master green refacing and transform tired cabinets into a highlight of your home.
1. What Tools Are Needed?
A successful DIY kitchen cabinet makeover starts with the right equipment. You will need an electric orbital sander fitted with 120 to 220 grit pads for large surfaces, and a hand sanding block with 320 grit for corners and detailed edges. For painting, choose low-VOC primer and topcoat options such as acrylic or chalk paint, and apply them with high-quality synthetic-filament brushes or mini foam rollers. Painter’s tape and drop sheets help protect surrounding areas during application.
If you opt for veneering, gather pre-glued veneer sheets or contact adhesive, along with a veneer roller or J-roller to smooth the surface and remove air bubbles. You will also need a craft knife and veneer trimming block for clean edges. For assembly, use eco hardware such as brushed brass or matte black handles made from recycled metals, and fit them using a screwdriver or cordless drill with torque control. Cam-lock fittings are helpful for green refacing systems. Lastly, be sure to wear safety gear including a dust mask (P2 or FFP2 rated), nitrile gloves, and safety glasses.
Pro Tip: Renting an orbital sander from your local DIY hire shop can significantly reduce costs, explore more ideas for achieving a luxury kitchen on a budget.
2. Prep Steps: Salvage Cabinet Doors & Surfaces
Preparation is crucial. To ensure a professional finish on your cabinet up-cycle, start by removing all cabinet doors and hardware. Label each door and hinge position with masking tape and pencil to make reassembly easier, then store all screws and fittings in clearly labelled bags.
Next, clean every surface using a degreasing cleaner or sugar-soap solution, followed by a rinse with clean water. Allow surfaces to dry fully. Sanding comes next, beginning with 120 grit on an orbital sander to strip any old paint or varnish. Move up to 180 to 220 grit for a smoother finish, and use a hand block for grooves and detailed edges.
Fill any chips or dents using an eco-friendly wood filler, then sand again with 220 grit once it’s dry. Mask off all internal cabinet edges, hinge recesses, and nearby surfaces with painter’s tape, and cover adjacent areas with drop sheets.
Sanding Tip: Always sand along the grain to avoid scratches that may show through your topcoat.
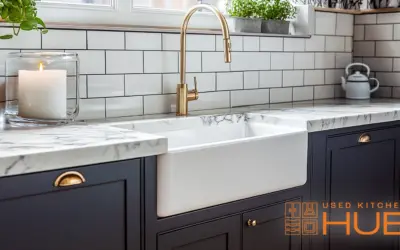
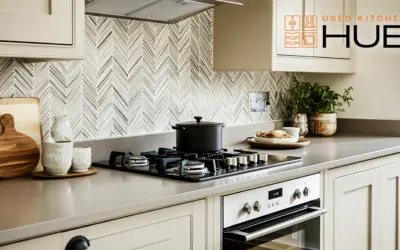
3. Best Materials: Paint vs Veneer & Eco Hardware
Choosing between paint vs veneer depends on your desired look, experience level, and budget.
For a painted finish, products like *Little Greene Intelligent Eggshell* or *Earthborn Claypaint* are excellent low-VOC options. These paints offer flexibility in colour and finish, and are ideal for beginners. Start by applying a water-based bonding primer, followed by a light sanding with 320 grit after it dries. Add two topcoats, sanding lightly between each for a smooth, lasting result.
If you prefer a sustainable veneer refacing, consider materials such as *reclaimed oak veneer* for a rustic texture or *bamboo veneer* for a minimalist style. Apply with contact adhesive or use pre-glued backings. Smooth the veneer flat with a roller to remove air pockets, then trim neatly with a craft knife and veneer block. Seal the surface using a low-VOC clear lacquer for added durability.
When it comes to eco hardware, choose bar handles or knobs made from recycled metal or FSC-certified wood. Prioritise materials that are free from plastic coatings or high-VOC finishes for a greener result. Salvaging old handles from charity shops and refinishing them with low-VOC spray lacquer is an excellent way to stay on budget and add character for under £5 per piece.
4. Time Required: Project Timeline
Setting realistic expectations will keep your cabinet up-cycle on track. Begin with door removal and labelling, which typically takes 1 to 2 hours. Cleaning and initial sanding should take another 2 to 3 hours, followed by 2 hours for filling and final sanding. Priming will take about an hour, plus a four-hour drying time. Applying topcoats or veneer can take 2 to 3 hours, with added time for drying. Trimming edges or adding a second coat may require an additional 1 to 2 hours. Finally, fitting hardware and reassembly should take another 1 to 2 hours.
Altogether, you should allow for 2 to 3 full days to complete the process.
Tip: Always lay doors flat on sawhorses to prevent drips and achieve an even, professional finish.
5. Cost Breakdown: Budget Transformation Numbers
Upcycling ten cabinet doors and five drawers can be done for under £450. For materials, budget around £20 for low-VOC primer and £50 for topcoat paint. Sandpaper in various grits will cost around £15, while eco-friendly wood filler is typically £8 per tub. Veneer options, such as reclaimed oak, will cost about £20 for two square metres. Contact adhesive for veneer work costs around £12, and eco hardware, priced at roughly £4 per piece, totals £60 for 15 handles.
Additional materials like painter’s tape, drop sheets, gloves, and safety masks will add about £18. If you estimate 12 hours of DIY time valued at £15 per hour, your labour contributes £180 to the total. Even with tool hire, such as an orbital sander at approximately £25 per day, your DIY kitchen cabinet makeover remains a highly effective budget transformation solution, delivering a revitalised kitchen at a fraction of the cost of a full renovation.
If you’re considering purchasing a used or ex-display kitchen, coordinating its removal and delivery can be a challenge. Used Kitchen Hub offers a professional dismantle and delivery service to ensure your kitchen arrives safely and efficiently. Learn more about this service here.
Ready to refresh your kitchen without breaking the bank? Choose your finish, gather your materials, and start your own DIY kitchen cabinet makeover today. Whether you go for paint vs veneer, you’ll find it’s one of the most rewarding home projects you can take on.
Looking for style inspiration before you start? Browse our up-cycled kitchens to see how others have transformed pre-loved units into standout spaces.
FAQs
1. What tools are needed?
You’ll need an orbital sander with 120 to 220 grit pads, sanding blocks, low-VOC primer and paint or veneer, a veneer roller, eco hardware, good-quality brushes, and basic safety gear.
2. What are the prep steps?
Start by removing and labelling doors and fittings, clean surfaces thoroughly, sand back any existing coatings, fill dents, and mask off surrounding areas before applying paint or veneer.
3. What are the best materials?
Low-VOC paints from brands like Little Greene and Earthborn work well for painted finishes. Reclaimed oak or bamboo veneers are ideal for green refacing, while FSC-certified or recycled metal hardware completes the look.
4. How much time is required?
Plan for two to three days, including drying time. Breaking the project into stages and working on flat surfaces helps ensure a smoother process.
5. What’s the cost breakdown?
Expect to spend between £350 and £450. This includes paint or veneer, eco hardware, sanding supplies, and about 12 hours of DIY time, delivering big visual impact for a modest investment.